Skyrim:Shalidor's Maze
|
||
|---|---|---|
| # of Zones | 1 | |
| Clearable | Yes (see notes) | |
| Dungeon | Yes | |
| Respawn Time | 10 days | |
| Occupants | ||
| Atronachs, Dremora, Ice Wraith, Skeevers | ||
| Important Treasure | ||
| Diadem of the Savant Liminal Bridges Spell Tome: Heal Other |
||
| Console Location Code(s) | ||
| MazeEntrance, MazeStart | ||
| Region | ||
| Hjaalmarch | ||
| Location | ||
| East of Labyrinthian Southwest of Skyborn Altar |
||
| Special Features | ||
| Word Wall | Dismay | |
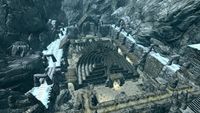
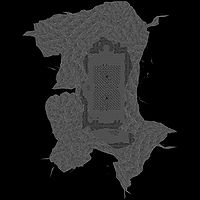
Shalidor's Maze is a small Nordic ruin east of Labyrinthian containing atronachs and a dremora. It contains only one zone, Shalidor's Maze.
Walkthrough[edit]
Exterior[edit]
The entrance is at ground level on the east side of Labyrinthian's outdoor ruin, just east of the mound-like structure containing the ruined dragon priest monument. Despite the location's name, it is not actually a maze, as there are no intersections where you must decide which way to turn.
There is a novice-locked chest and a large urn just outside the entrance. See Labyrinthian for full details of the surrounding ruin.
Shalidor's Maze[edit]
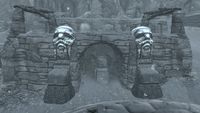
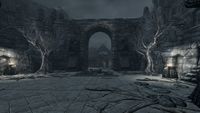
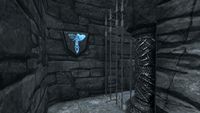
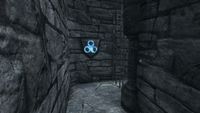
You enter into a corridor descending a flight of stairs to the north. After a couple turns, the corridor opens into an open-air courtyard with a large stone wall ahead. There is an arch through the middle of the wall, and stairways up to the top on either side of the courtyard. In front of the arch, there is a large flower bed and a tree growing on either side. This flower bed, along with more around the courtyard and hanging from the walls and arches outside the maze, contains plants that are listed in the table below. Taking either stairway leads to the top of the wall and provides a good view of the maze beyond the arch, also giving you access via Whirlwind Sprint to the top of the walls surrounding the maze and courtyard. These walls can also be reached by jumping around the obstructing rock face on the western side. On the western wall, near the northwest corner of the area in an easily missed alcove, is an unlocked chest. To easily locate this chest, after you pass the sloped part of the wall, walk under the first square arch then stop just before the next one; the alcove will be on your left. On the eastern wall, there is another alcove with a lootable skeleton, a leveled weapon (up to Daedric in quality), and a random shield. The easiest way to reaching this alcove is to continue around from the west wall, climb the peaked roof over the word wall, and keep going. The two (western and eastern) alcoves are almost directly opposite each other.
| Plants |
|---|
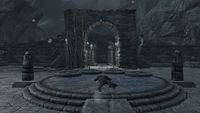
Beyond the arch near the entrance is another courtyard with a raised circle. Atop the circle is a burnt corpse holding a filled soul gem and a note. By the corpse are four smaller circles, each projecting a staff, namely, staves of Fear, Firebolts, Magelight, and Repulsion. The staves represent spells from the schools of Illusion, Destruction, Alteration, and Restoration, respectively. On either side of this area are two more flower beds, each containing a tree and plants. Behind the staves is an archway to the start of the maze. You can walk all the way around the outside of the maze to reach the word wall at the other end of the maze, which teaches part of the Dismay shout.
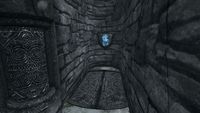
Entering the maze from the beginning, you pass two shutters that contain four loose gold coins and a random filled soul gem. The path heads north to a turning to the east; here, it is barred. To the right of the bars is a shutter that contains a scroll of Magelight. There is a Sigil of Alteration on the north wall, which requires you to cast Magelight on the sigil to lower the bars. You can use a scroll, staff, or spell to cast Magelight; all will work. Follow the linear path through this part of the maze, opening the shutters as you go. Some of them hold items including a flute, two pieces of charcoal, or a loose gold coin, but most hold nothing. You will encounter a couple skeevers in this part of the maze. When you reach the end of the path, you will find the Sigil of Destruction, which requires you to cast Firebolt or another targeted Destruction spell. When you do, the floor will open and allow you to drop and continue onward.
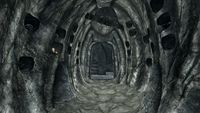
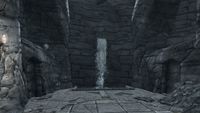
The shaft has three beams across it to help break your fall. Growing from these beams are hanging moss plants. Once you reach the bottom, the path continues to the south and enters a typical catacomb-style area. At the crossroads, the path to the east is a dead end. The southern path ends in a shaft similar to the one you dropped down earlier, with beams across it and a trap in the ceiling. Heading west leads toward a stone wall that rises as you approach to reveal a spiral staircase leading up and out of the maze on the west side, opposite a waterfall. Take the stairs and head north to the word wall and the second entrance.
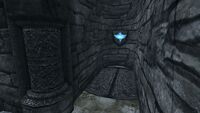
This end is blocked by bars, similar to the southern end; this time, the nearby wall is marked with the Sigil of Illusion, which requires the use of any targeted Illusion spell to open the way, such as Fear. In this section of the maze, you will find the following items in the shutters: a horker tusk, bloody rags, a piece of bent Dwemer scrap metal, an emerald, an amethyst, and a garnet together, a centurion dynamo core, and a Spell Tome: Heal Other. You will encounter an ice wraith and two skeevers. The skeevers might be found already dead, killed by the ice wraith. You will also pass a dead skeleton that can be looted, and a copy of the Conjuration skill book Liminal Bridges next to it. At the end of the path, the wall bears the Sigil of Restoration, which requires the use of a targeted Restoration spell or use of the Staff of Repulsion. The drop beyond this barrier is to the shaft opposite where you landed last time. Directly ahead will be a sphere of magical energy blocking the way. This sphere will only appear if all four sigils have been activated.
As you approach the sphere, you will be teleported to a circular platform with a leveled dremora who will summon a flame atronach and shoot firebolts at you. Once the dremora loses a certain amount of health, you will be teleported back to the entrance to Shalidor's Maze. Two leveled atronachs will appear beyond the arch and immediately attack; the dremora will also appear in front of you if you did not kill him in the magical sphere. If the dremora appears outside the sphere, killing him will enable you to loot a Diadem of the Savant from his corpse along with a Daedra heart and a random weapon. The diadem reduces the magicka cost of all spells by 5%. To obtain this item, it is recommended to let the dremora survive the earlier fight in the magical sphere. Alternatively, if you kill him quickly during the Trial of Conjuration, you may loot the diadem from his corpse there, though killing him in one hit may cause you to become stuck in the sphere (see bugs).
Notes[edit]
- This location cannot be independently cleared. It is only shown as cleared when the boss draugr of Labyrinthian has been killed, as the maze is considered to be part of Labyrinthian. The maze never adds to your count of cleared locations, and therefore does not contribute to the Delver achievement.
- Fast travel is not available in Shalidor's Maze, nor will the Call Dragon shout summon Odahviing.
- If you do not wish to use the staves, it is possible to jump into the maze from the side parapets. Alternatively, casting the corresponding spells will suffice; for the Sigil of Alteration, a useful scroll is also available nearby.
- If you are interested only in the word wall, you can access it by going around the maze (either left or right).
- If you get caught on the peak while climbing the roof over the word wall, jump toward the north (rear) and you'll be freed.
- For a more in-depth guide on Shalidor's Maze, read the book A Minor Maze.
Bugs[edit]
- In the French, Italian, Spanish, German, Dutch, Russian, Polish, and Japanese versions of the game, a bug prevents you from finishing the maze. Even if you cast the right spell on the right sigil, nothing happens.
- The Official Skyrim Patch, version 1.4, fixes this bug.
- Change the game's language to English to bypass the bug.
- In the French, German, Spanish, and Italian versions of the game, traps in the area may not work properly.
- The Official Skyrim Patch, version 1.4, fixes this bug.
- If the dremora is killed by your first hit (as may occur if you have the Devastating Blow perk), the dremora won't teleport back to the maze entrance, and you will get stuck in the Trial of Conjuration zone.
- Try attacking the dremora corpse with a melee weapon. This can sometimes allow you to progress through the trial.
- Sometimes a sigil will not activate, or the Trial of Conjuration zone may not trigger.
- If this happens, try walking the maze again.
- Also try a variety of spells and staves if the first one fails. The Restoration sigil, for example, may not activate with Healing Hands, but instead with Repel Lesser Undead.
- Your follower may refuse to leave the area after completing the maze. If you dismiss them, they may not return home.
-
The Unofficial Skyrim Patch, version 2.0.4, fixes this bug.
- Try fast traveling to a nearby location, and your follower should reappear when the game loads.
You may move outside the labyrinth and use the console to move your follower to you (
prid [follower's refID]followed bymoveto player). They should then follow you as normal.- Dismissing and rehiring your follower may fix this.
-
- Followers may also remain stuck in the maze before completing it.
-
The Unofficial Skyrim Patch, version 2.0.4, fixes this bug.
-
- A respawning copy of the Diadem of the Savant can also be found on the wood chopping block outside Froki's Shack.
-
The Unofficial Skyrim Patch, version 1.2.5, addresses this issue. It changes the diadem outside Froki's Shack into a leveled circlet with a Fortify Archery effect.
-
