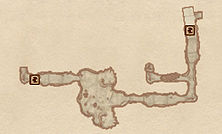
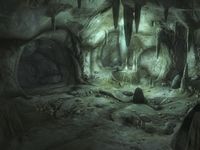
Oblivion:Sundercliff Watch
|
|||
|---|---|---|---|
| Added by | Mehrunes' Razor | ||
| # of Zones | 12+ | ||
| Occupants | |||
| NPCs (Drothmeri Army), Vampires | |||
| Console Location Code(s) | |||
| DL09Exterior01a, DL09Exterior02; DL9c01 (Sundercliff Watch); DL9c02 (Sundercliff Village); DL9c03 (Sundercliff Commune); DL9c04 (UNUSED CELL); DL9c05 (Sundercliff Mines); DL9c06 (Sundercluff Forge); DL9c07 (Excavated Ruin); DL9c08 (Varsa Baalim); DL9c09 (The Nefarivigum); DL9c10 (Forgotten Tunnels); DL9c08house1 (Cava Arpenia); DL9c08house2 (Cava Beldameld); DL9c08house3 (Cava Marspanga); | |||
| Region | |||
| Nibenay Basin | |||
| Location | |||
| Far east of Bravil, east of Lake Canulus and very near the border with Morrowind | |||
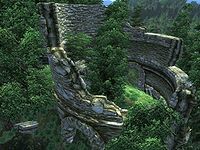
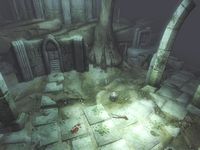
Sundercliff Watch is a very large fort far east of Bravil containing NPCs and vampires (download-specific).
The location is added with the Mehrunes' Razor official download, and houses the eponymous artifact.
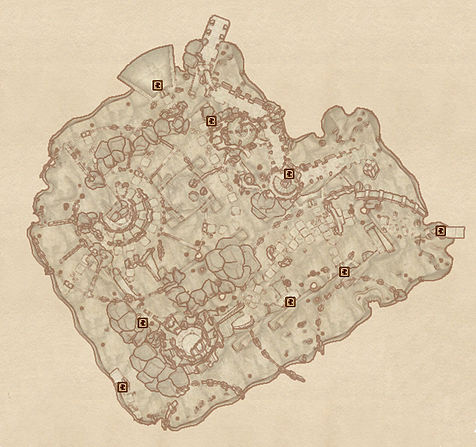
Sundercliff Watch is the largest dungeon in the game, containing a mixture of caves, buildings and Ayleid ruins. The location consists of 23 zones in total. The nine main zones are Sundercliff Watch, Sundercliff Village, Sundercliff Commune, Sundercliff Forge, Sundercliff Mines, Excavated Ruin, Varsa Baalim, The Nefarivigum, and Forgotten Tunnels. Three smaller zones, Cava Arpenia, Cava Beldameld and Cava Marspanga link different areas of Varsa Baalim together, and in addition, there are multiple houses, side rooms and tents.
Sundercliff Watch served as a waystation in the time of the Reman Dynasty but has long been forgotten.
People[edit]
|
Related Quests[edit]
- Unearthing Mehrunes Razor: Conquer one of the deepest and most challenging dungeons in all of Cyrodiil to claim this fearsome weapon.
Notes[edit]
- A second entrance can be found underwater at the northeastern tip of Lake Canulus, about 100 feet to the west of the main entrance. It leads to the Forgotten Tunnels but cannot be used to access any other zones until you have completed the related quest, due to a key-requiring door.
- In the Excavated Ruin, you can see a vampire and a Drothmeri member through a window you cannot go through. If you
tclthrough the window, you can find a hidden door to an area identified in the game as "UNUSED CELL" (editor IDdl9c04), which is just an Ayleid floor and door floating in a grey void. Entering the cell will show the message "You should not be here" until you leave it. The room's script is set to show the message to the player and all essential characters and to disable any non-essential characters. - This ruin contains 3 Cairn Bolete plants and 6 Potato plants.
- Sundercliff Watch also appears in ESO as Fort Sundercliff, named for the surrounding town of Sundercliff.
Exterior[edit]
- The exterior is located at coordinates: Tamriel 48, -6 and 49, -6.
- This location's map marker (M on map) is named Sundercliff Watch (editor name DL09MapMarker). The entrance door is south-southeast of the marker, 35 feet away.
- 1 Wilderness Creature (Mountains variety) is near the entrance.
- The following plants can be found near the entrance: 2 Columbine plants, 15 Foxglove plants, 17 Green Stain Cup plants, 8 Monkshood plants, 1 Motherwort plant and 24 Summer Bolete plants.
Zone 1: Sundercliff Watch[edit]
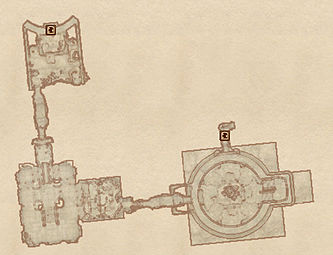
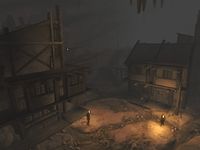
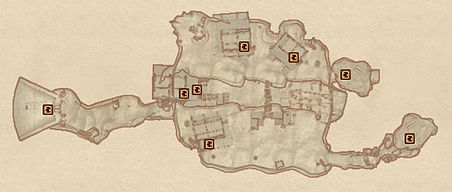
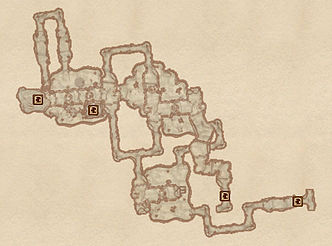
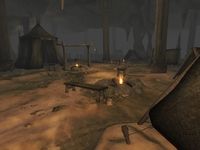
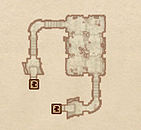
Upon entering the ruin, you will notice it is a mix of cave and fort architecture, with what looks like a bandit campsite in the first room. Here you will find one Drothmeri Soldier or Recruit, while another soldier patrols nearby. In the southeastern corner you will find a minor loot chest and a table with an iron arrow and an iron shield. Head past a collapsed statue of Stendarr and down the tunnel to the east until you reach an Old Wooden Door (D). If you try to open it, you are told that "A voice beyond the door calls out: Who gathers stormclouds over Nirn?". At first, your only option in response is to say nothing. However, if you check the Abandoned Knapsack (K) just to the right of the door, you will find a small diary with the required password: "Chimer". Note that unless you are sneaking, you will likely be detected by the enemies on the other side of the door.
Once you open it, you will be immediately faced with the Drothmeri Steward (S), who is sitting at a desk hosting two sacks of gold, a flawed diamond, a flawed emerald, a flawless sapphire, 4 gold coins and the Steward's Registry (E). Fighting the Steward is also likely to draw in one or both of the two nearby soldiers or recruits. Make your way down a number of stairs, loot the chest and healing potion sack along the way and dispatch the patrolling soldier you'll likely come across.
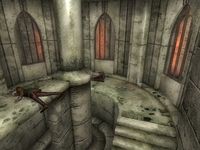
The final room of this zone resembles a large fort tower, open in the middle. You arrive on the top floor and this provides you with good sniping opportunities: there is a veteran on the level below you, a soldier or recruit on your level as well as another recruit who will always be sleeping on the bedroll (b) across from where you enter. Dispatch them and head down the lowest level, where you will find a blazing bonfire and two tents with bedrolls (b). Use door C to access the Sundercliff Village.
Occupants:
- 4 Drothmeri (Drothmeri Soldier or Recruit; level-dependent)
- 1 Drothmeri Veteran
- 1 Drothmeri Steward
- 2 Drothmeri Soldiers (patrolling)
- 1 Drothmeri Recruit (always sleeping)
Treasure:
- 2 Chest 02
- 1 Sack (Healing)
- 2 Sacks (Gold)
- 1 Abandoned Knapsack (at K; containing the Small Diary)
- The following note will always be found: Steward's Registry
- The following items will always be found: 1 Flawed Diamond, 1 Flawed Emerald, 1 Flawless Sapphire, 1 Iron Arrow, 1 Iron Shield and 4 gold coins
- Some of the above items are clustered at the following locations:
- At E: 1 Flawed Diamond, 1 Flawed Emerald, 1 Flawless Sapphire, 4 gold coins and the Steward's Registry
Doors and Gates:
- There are two doors in/out of this zone
- 1 door (at Out) leads outside
- 1 door (at C) leads to the zone Sundercliff Village
- 1 Old Wooden Door at D (requires password)
Other:
- 4 bedrolls at locations b on map
Zone 2: Sundercliff Village[edit]
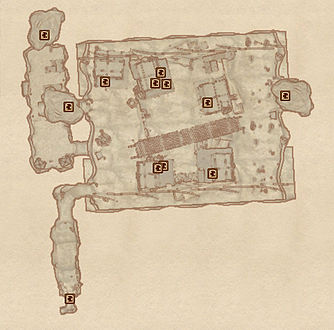
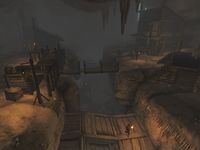
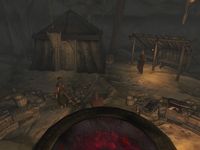
This zone is mostly taken up by a single very large cave on two levels with a plank bridge spanning across the middle. In the middle you will find a small village of five wooden buildings, most of which extend over multiple stories. After entering from door C and passing by an iron ore nugget you will arrive on the village's upper level. This can be useful for sniping, as without sneak its likely you will end up fighting multiple enemies at once. As well as up to two enemies near you when entering, there are another 1-2 on the lower level, 1-2 guarding the second story doors of the two eastern buildings and 1 on the western side of the upper level. In addition, one torch-bearing soldier will be patrolling the entire village, a Veteran can be found practicing his swordsmanship on the target in the southwestern corner and up to three recruits can be found training during the day.
On the eastern side of the top level when you enter you will find 1-2 soldiers or recruits huddled around a bonfire and guarding a nearby hutch. In the northwestern corner is the Jail (K) and a minor loot chest can be found just behind it. The door at D leads to the Sundercliff Forge. While it provides the quickest access to that zone, for a full exploration you will want to ignore it for now.
If you want to cross to the eastern side you can use the main plank bridge, though this will certainly cause you to be detected by the enemies below, or sneak along the northern or southern walls. To access the lower level you can either jump down, use the wooden stairs from the eastern side or enter either of the two buildings on the western side from the second floor door and then exit via the first floor door.
The southern building on the near (western) side of the cave is the Canteen and you can access its second floor door (I) by using the path along the southern wall. There may be an enemy posted as guard here, though if you're lucky they'll be sleeping on the nearby bedroll (b). From here you can also use the small plank bridge to access the Private Attic via the door at H (leveled lock). The first floor door of this building is boarded up, but you will find a hutch nearby. Meanwhile the building just to the east of the jail is the Recruit Barracks. You can either enter via the second floor door (G), although this will be guarded by an enemy, or use the trapdoor on the roof. The final building is the Soldier Lodgings, which you can enter from the lower level via door J.
On the eastern side of the upper level you will find an enemy guarding the door (F) to the Sundercliff Forge and two hutches (one on the Lodgings' roof). On top of the training target in the southeastern corner you will find an Empty Flask and a sack with healing potions.
Finally, if you take either of the tunnels heading west from the lower level you will reach a rectangular chamber used as a training area. In the southern section are two tents with bedrolls (b) while to the north are a few wooden platforms hosting a minor loot chest, two Keen Edge potions, a variety of iron weapons and a copy of Manual of Arms. A soldier will be patrolling nearby and usually at least one recruit can be found practicing here. The door at E takes you to the Sundercliff Commune.
Occupants:
- 4-7 Drothmeri (Drothmeri Soldier or Recruit; level-dependent)
- 2 Drothmeri Soldiers (patrolling)
- 1 Drothmeri Veteran (always training)
Treasure:
- 2 Chest 04 (Healing)
- 1 Sack (Healing)
- 4 Hutches (contain a mixture of food, gold, heavy armor, weapons and potions)
- The following items will always be found: 1 Iron Ore, 2 Keen Edge Potions and 1 copy of Manual of Arms
- The following weapons will always be found: 2 Iron Daggers, 2 Iron Longswords and 2 Iron Warhammers
Doors and Gates:
- There are four doors in/out of this zone
- 1 door (at C) leads to the zone Sundercliff Watch
- 2 doors (at D and E) lead to the zone Sundercliff Commune
- 1 door (at F) leads to the zone Sundercliff Forge
- There are five doors leading to sub-sections of this zone:
- 1 door (at G) leads to the Recruit Barracks
- 1 door (at H) leads to the Private Attic
- 1 door (at I) leads to the Canteen
- 1 door (at J) leads to the Soldier Lodgings
- 1 door (at K) leads to the Jail
Other:
- 1 bed at locations b on map
- 5 bedrolls at locations b on map
Recruit Barracks[edit]
This building is divided on two floors and will host up to three Drothmeri Recruits: depending on the time of the day they may instead be found training outside. On the top floor you will find two minor loot chests and three beds, while on the bottom floor are two sacks with healing potions, a repair hammer and a bottle of Cyrodilic brandy.
Occupants:
Treasure:
- 1 Chest 02
- 1 Chest 04 (Healing)
- 2 Sacks (Healing)
- The following items will always be found: 1 Cyrodilic Brandy, 1 Repair Hammer
Other:
- 3 beds
Private Attic[edit]
This building consists of a single room with a laborer and possibly a Drothmeri soldier or recruit guarding a bed and a minor loot chest. Just above the bed, perched on one of the rafters, is a plate with two flawless diamonds, a topaz, a flawed emerald, a flawed sapphire and a flawed ruby. You can reach it by jumping from on top of the bed.
Occupants:
- 0-1 Drothmeri (Drothmeri Soldier or Recruit; level-dependent)
- 1 Laborer
Treasure:
- 1 Chest 01
- The following gems will always be found: 1 Flawed Emerald, 1 Flawed Sapphire, 1 Flawed Ruby, 2 Flawless Diamonds, 1 Topaz
Other:
- 1 bed
Canteen[edit]
When entering from the second floor door you may immediately find yourself fighting a soldier or recruit, so be prepared. Loot the chest nearby and head downstairs, where you will find another soldier or recruit guarding another chest. Beyond the chests there is no loot, beyond a surfeit of foodstuffs.
Occupants:
- 1-2 Drothmeri (Drothmeri Soldier or Recruit; level-dependent)
Treasure:
Soldier Lodgings[edit]
This building can only be accessed via the door on the first floor, on the lower level of the village. On the bottom floor you may find a Drothmeri soldier or recruit as well as a minor loot chest and a table with 8 gold coins, a flawed ruby and a topaz. On the upper floor are up to two more soldiers or recruits guarding another minor loot chest, a healing potions sack, a locked jewelry box, two beds, a bedroll and a dining table laden with food.
Occupants:
- 1-3 Drothmeri (Drothmeri Soldier or Recruit; level-dependent)
Treasure:
- 1 Chest 02
- 1 Chest 03
- 1 Sack (Healing)
- 1 Jewelry Box (leveled lock)
- The following items will always be found: 1 Flawed Ruby, 1 Topaz, 8 gold coins and 1 Biography of Barenziah, v 3
Other:
- 2 beds
- 1 bedroll
Jail[edit]
This building is quite small and has no enemies. To the left when entering is a locked cell door (leveled; minimum Average). Behind it is a bedroll and a Morag Tong Assassin, who you cannot speak to but can free by unlocking the door. Doing so will cause him to seek out and attempt to kill the Drothmeri Commander, so this can be useful. The main room hosts a bedroll and a table with two wrist irons and a letter explaining the situation with the prisoner.
Occupants:
Treasure:
- The following note will always be found: 1 Jailor's Letter
Other:
- 2 bedrolls
Zone 3: Sundercliff Commune[edit]
It's recommended to enter from door D, as you will then emerge on the upper level of this zone's main chamber. Specifically, you will be on the southern side, with a deep central canyon separating you from the northern side. A rope bridge crosses the canyon while a winding set of wooden stairs spirals down to the bottom level, which can be access from door E.
After entering from door D, loot the chest and healing potions sack at the end of the corridor and enter the main room. To the west is the Yeoman Barracks (G), with a minor loot chest behind it. You will usually find a Drothmeri recruit training his archery skills nearby while another recruit or soldier is posted at the bridge. Two Drothmeri soldiers also patrol the upper level: one covers the bridge while the other moves up and down the wooden stairs. Also on the southern side you will find a minor loot chest, a hutch and an Iron Battle Axe. On the northern side are the Commander's Quarters (C) and Frathen Dothran's Quarters (F). A minor loot chest and two healing potions sacks can be found on the former's porch while another potions sack and minor loot chest can be found behind the latter. The northwestern corner hosts a potato garden tended to by an Argonian Laborer.
The lower level of the Commune hosts the Veteran's Lodge (H), whose entrance is guarded by a Drothmeri veteran. Between the lodge and wooden stairs to the upper level are a minor loot chest and a healing potions sack, while just in front of it is another minor loot chest. Head west past the lodge and you will arrive at a magically-sealed Ayleid door (I). Guarding it are up to two more Drothmeri (one a veteran), while a bedroll (b) is also nearby. To open it you will need to place the two bezoars in the pedestals either side of the door, which will then provide you access to the Excavated Ruin.
Occupants:
- 1-2 Drothmeri (Drothmeri Soldier or Recruit; level-dependent)
- 2 Drothmeri Veterans
- 2 Drothmeri Soldiers (patrolling)
- 1 Drothmeri Recruit (practicing archery)
- 1 Argonian Laborer
Treasure:
- 3 Bandit Chest 01
- 2 Bandit Chest 02
- 1 Bandit Chest 04 (Healing)
- 5 Bandit Sack (Healing)
- 1 Conjurer Chest 02
- 1 Hutch (contains a mixture of food, gold, heavy armor, weapons and potions)
- The following items will always be found: 1 Iron Battle Axe
Doors and Gates:
- There are three doors in/out of this zone
- 2 doors (at D and E) lead to the zone Sundercliff Watch
- 1 door (at I) leads to the zone Excavated Ruin
- There are four doors leading to sub-sections of this zone:
- 1 door (at C) leads to the Commander's Quarters
- 1 door (at F) leads to the Frathen Dothran's Quarters
- 1 door (at G) leads to the Yeoman Barracks
- 1 door (at H) leads to the Veteran's Lodge
Other:
- 1 bedroll at location b on map
Commander's Quarters[edit]
The quarters are divided into two floors. On the first floor where you enter is a dining room and a crawl space hidden behind a wooden Closet Door (Easy lock), where you will find a flawed emerald, a flawed sapphire, a flawed ruby, 2 flawless diamonds and a topaz on top of a clay plate. The living area is upstairs and is comprised of two rooms. The first room hosts a boxing bag where the Commander will often train as well as a boss chest and a Psychic Motion scroll. The second room contains a bed, a table with a number of books and two maps of Kvatch, and a bedside table with a Drothmeri Tunic, a jewelry box and one of the two bezoars you will need to enter the Excavated Ruin.
Occupants:
Treasure:
- 1 Bandit Boss Chest 02
- 1 Jewelry Box
- The following quest items will always be found: Enchanted Bezoar
- The following books will always be found: 1 Guide to Cheydinhal, 1 Guide to the Imperial City, 1 Frontier, Conquest and 1 Mixed Unit Tactics
- The following gems will always be found: 1 Flawed Emerald, 1 Flawed Sapphire, 1 Flawed Ruby, 2 Flawless Diamonds, 1 Topaz
- The following items will always be found: 1 Drothmeri Tunic and 1 Psychic Motion scroll
Other:
- 1 bed
Frathen Drothan's Quarters[edit]
This building is on two levels, but the lower floor is still in the process being dug out and you will only find shovels, rock debris, a bed and two iron ore veins there. In the main room where you enter you will find three sacks containing gold and a table with three iron ores, a gold nugget, two scrolls of Transmutation and a novice mortar & pestle. On the opposite side is another table with four gold coins and Drothan's Journal, as well as a shelf with a Varla stone, a common soul gem, two lesser soul gems, two Trichobezoar Extract potions, an apprentice retort, a receipt, and a number of books including a copy of Treatise on Ayleidic Cities. Seven more scrolls of Transmutation can be found in a hidden space behind a wooden False Wall with a Very Hard lock.
Treasure:
- 3 Sacks of gold
- The following books will always be found: 1 Treatise on Ayleidic Cities, 1 Drothan's Journal, 1 Varieties of Daedra, 1 Tamrielic Lore, 1 On Morrowind, 1 Manual of Spellcraft, 1 The Eastern Provinces, 2 The Book of Daedra and 1 Guide to Cheydinhal
- The following items will always be found: 9 Scrolls of Transmutation, 1 Apprentice Retort, 1 Novice Mortar & Pestle, 1 Receipt, 1 Varla Stone, 4 gold coins, 1 Gold Nugget, 3 Iron Ores, 2 Trichobezoar Extract, 1 Common Soul Gem (filled; Lesser soul) and 2 Lesser Soul Gem (both filled; 1 Lesser and 1 Petty soul)
Other:
- 1 bed
- 2 iron ore veins
Yeoman Barracks[edit]
The barracks are a small, one-room building and immediately upon entering you will come across a Drothmeri Soldier or Recruit. The rest of the room hosts a dining table laden with food and drink, a double bed, a locked minor loot chest and four iron arrows. On a mantle piece you will find an iron bow, a silver shortsword, a flawed topaz, a flawed sapphire and 2 gold coins.
Occupants:
- 1 Drothmeri (Drothmeri Soldier or Recruit; level-dependent)
Treasure:
- 1 Chest 01
- The following items will always be found: 1 Biography of Barenziah, v 1, 4 Iron Arrows, 2 gold coins, 1 Flawed Topaz, 1 Flawed Sapphire, 1 Silver Shortsword, 1 Iron Bow
Other:
- 1 bed
Veteran's Lodge[edit]
This building is divided on two floors and will host up to three Drothmeri, one of which will always be a Veteran. On the first floor you find a dining room and a boss chest with a pair of iron gauntlets on top of it. Upstairs are two single beds and a minor loot chest.
Occupants:
- 0-2 Drothmeri (Drothmeri Soldier or Recruit; level-dependent; 50% chance each)
- 1 Drothmeri Veteran
Treasure:
- 1 Bandit Chest 02
- 1 Marauder Boss Chest
- The following items will always be found: 1 Iron Gauntlets
Other:
- 2 beds
Zone 4: Sundercliff Mines[edit]
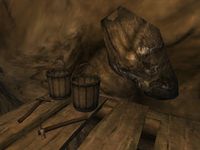
You can only enter this zone from the Sundercliff Forge, so skip to that section first. When entering via door G head south along the tunnel and you will emerge in a large room split on two levels. You will be on the lower one, which hosts most of Sundercliff's mining activities: wooden scaffolding and buckets attached to rope pulleys can be found throughout. Eight Drothmeri Soldiers can be found patrolling the zone and you will likely face at least two on the lower level, alongside three Laborers. There are seven iron veins on this level as well as eighteen iron ores and a ruby either on tables or in the hanging buckets. A minor loot chest can also be found underneath one of the wooden scaffolds.
Make your way to the upper level next via the tunnel in the southeastern corner. The tunnel itself hosts two more laborers and up to five soldiers. Note that due to their high Aggression it possible for them to actually fight each other, leaving you with an easier task of mopping up the survivors. Also along the way you will find a minor loot chest, a tent with a bedroll (b), six iron veins and six mined iron ores.
The upper level is split into four separate areas, three of which are connected by stone bridges. The western section can only be accessed via Acrobatics, so can be a good spot for ranged attacks or for some respite if you're fighting multiple enemies at once. In the northwestern corner you will find a special hoe in a barrel (F). The southeastern section hosts a minor loot chest, while the central section is empty and simply functions a connector to reach the northeastern section. Here you will find a campsite inhabited by a soldier and a laborer. There are five tents and as many bedrolls (b) as well as tables and benches around a campfire. Another minor loot chest is nearby. When you're ready, take the tunnel heading northeast to reach door H back to Sundercliff Forge.
Occupants:
- 1 Drothmeri (Drothmeri Soldier or Recruit; level-dependent)
- 7 Drothmeri Soldiers (6 of which patrolling)
- 6 Laborers (of which at least 2 Argonian and 2 Khajiit)
Treasure:
- 1 Chest 02
- 1 Chest 03
- 2 Chest 04 (Healing)
- The following items will always be found: 1 Ruby, 24 Iron Ores and 1 Hoe (F)
Doors and Gates:
- There are two doors in/out of this zone
- 2 doors (at G and H) lead to the zone Sundercliff Forge
Other:
- 13 Iron Ore veins
- 6 bedrolls at locations b on map
Zone 5: Sundercliff Forge[edit]
Upon entering from door F from the Sundercliff Village you will find yourself in a series of cave tunnels propped up by wooden beams and lighted by lamps at regular intervals. Along the floor are holes covered by buckets from which you can see the tunnels below, although you are not able to shoot arrows through them. You may come across a first patrolling Drothmeri soldier very shortly after entering, and the fighting may attract another soldier as well as a laborer. At the first intersection you can take either of the tunnels, as both eventually lead to door G to the Sundercliff Mines.
When returning from the Mines via door H you will arrive in a room with two laborers and the Weapons Apprentice (W). Here you will also find a forge, a tent with a bedroll (b), a table with an interesting note, a repair hammer and four iron shortswords. The next room instead hosts the Armor Apprentice (A) and another laborer. Here too you will find a forge and a tent with a bedroll (b), as well as a table with a Letter Home. Scattered around are also ten iron boots.
In the third room you will instead find The Forgemaster (M), surrounded by his work: an iron claymore, three iron daggers, a pair of iron greaves, two iron longswords and a repair hammer. The large tent nearby is a separate sub-section, entered via door I. Once you have claimed the bezoar within, take the northern tunnel until you arrive at the rock wall at E, which is opened by pulling the nearby rope. You will now find yourself back at door F.
Occupants:
- The Forgemaster at location M on map
- Armor Apprentice at location A on map
- Weapons Apprentice at location W on map
- 2 Drothmeri Soldiers (patrolling)
- 4 Laborers
Treasure:
- The following armor and weapons will always be found: 12 Iron Boots, 1 Iron Claymore, 3 Iron Daggers, 1 Iron Greaves, 2 Iron Longswords and 4 Iron Shortswords.
- The following gems will always be found: 1 Diamond, 1 Flawed Emerald, 16 Iron Ore nuggets and 1 Sapphire
- The following items will always be found: 1 Manual of Arms, 1 Manual of Armor, 1 Apprentice's Note, 1 Letter Home, 3 Repair Hammers
Doors and Gates:
- There are three doors in/out of this zone:
- 1 door (at F) leads to the zone Sundercliff Commune
- 2 doors (at G and H) lead to the zone Sundercliff Mines
- There is one door leading to sub-sections of this zone:
- 1 door (at I) leads to the Forgemaster Tent
- 1 Rock Wall at E
Other:
- 2 bedrolls at locations b on map
Forgemaster Tent[edit]
The tent is a single room a bed and a boss chest, as well as a table and a shelf. On the table you will find a flawed diamond, a flawed ruby, a flawless topaz, three gold coins and one of two enchanted bezoars you will need to be able to access the Excavated Ruin. The shelf hosts a number of books, an iron dagger and a pair of iron gauntlets, while an iron warhammer is propped against it.
Treasure:
- 1 Marauder Boss Chest
- The following quest items will always be found: 1 Enchanted Bezoar
- The following items will always be found: 1 Blacksmith's Apron, 1 Flawed Diamond, 1 Flawed Ruby, 1 Flawless Topaz, 3 gold coins, 1 Iron Dagger, 1 Iron Gauntlets and 1 Iron Warhammer
- The following books will always be found: 1 Manual of Armor, 1 Manual of Arms, 1 On Morrowind and 1 The Lusty Argonian Maid
Other:
- 1 bed
Zone 6: Excavated Ruin[edit]
Upon entering from door I you will notice a distinct shift from cave to Ayleid ruin, and also start to realize something is not fully right, despite the zone itself being devoid of enemies. In the first room you will find overturned tables, pools of blood and a large stack of bones and skulls. In the tunnel to the south you will find a skeleton trapped under a rockfall, so head east instead. The next corridor is a long balcony overlooking a large room which you cannot access. Along the way you'll find a diamond and a ruby next to a pickaxe, as well as blood marks throughout. Press on until you reach door J leading to Varsa Baalim.
Treasure:
- The following items will always be found: 1 Diamond, 1 Ruby and 1 Iron Dagger
Doors and Gates:
- There are two doors in/out of this zone
- 1 door (at I) leads to the zone Sundercliff Commune
- 1 door (at J) leads to the zone Varsa Baalim
Zone 7: Varsa Baalim[edit]
This large zone is a mixture of Ayleid ruin and cave and is split into three separate areas that are connected by the smaller zones Cava Beldameld and Cava Marspanga. Another small zone -- Cava Arpenia -- can be reached from doors K and L. Throughout the zone you will come across Drothmeri soldiers fighting vampires, so you can often wait for the combat to play out and then mop up the survivors.
Upon entering from door J, you will find yourself on the upper level of the cave with a bloody stone ramp leading down to the central area, where two Drothmeri soldiers are engaged in combat with three vampires. A dead and bloodied Drothmeri Veteran lies sprawled nearby alongside his steel longsword. Before pressing on past the scene of the fight, make your way along the southern wall round a curving Ayleid wall, until you reach an opening to your left. Loot the nearby chest and then head back down. From here you can enter Cava Arpenia via the nearby doors K and L or continue exploring this zone.
If you have sufficiently high Acrobatics you can jump over the wall to the north; otherwise you will need to continue to the southwest, past another dead Veteran. Make your way through the collapsed ruins past two more vampires fighting two Soldiers, until you reach door M to Cava Beldameld.
When you re-emerge from door N you will find yourself on the upper level of the room, just above the previous door. Immediately to the southeast are two Soldiers fighting two vampires. Past them is a campsite sheltered by an Ayleid wall where you will find a candle-lit altar adorned with skulls, a campfire, two bedrolls (b), two minor loot chests and a large quantity of bones. Return to the door and head northwest along the room's wall this time. After coming across another dead Veteran, jump down into the circular ruin to the east, where you will find a vampire. From here you can take a stone ramp to the south to return to door M or head north, where you will find another dead veteran, two more vampires and the door (O) to Cava Marspanga. Before using it though, head south to access three minor loot chests: two are tucked in the far southeastern corner while the third is to the southwest. From the open room where you find the latter chest, jump up the stones so you are level with the walls and then make your way southeast along them, until you can jump to the rocky outcrop to the south. Here you will find a skeleton lying next to a boss-level chest (B). Note that unless you are sneaking you will likely be detected by vampires on the upper level nearby, which can only be reached with high Acrobatics at this stage.
After returning from Marspanga via door P, first head west along the room's wall until you reach a small area with a campfire, a bedroll (b) and two minor loot chests, all guarded by a vampire. There is also a convenient sniping spot nearby with a stool, an iron bow and some arrows. Turn to the east now and head up the stone ramp where a soldier is fighting a vampire. Press on until you reach the circular ruins ahead, where you will find the boss-level vampire (A) guarding a boss chest (B) and the door (Q) to The Nefarivigum. If you continue east down the bloodied stone causeway you will eventually spot a dead Drothmeri recruit (R) carrying an undelivered letter.
Occupants:
- 1 boss-level Vampire (50% chance Vampire Matriarch, 50% chance Vampire Patriarch; always strongest possible for your level) at location A on map
- 7 Drothmeri Soldiers
- 12 Vampires
- 4 Drothmeri Veterans (dead)
- 1 Drothmeri Recruit (dead)
Treasure:
- 1 Boss Ayleid Coffer at location B on map
- 1 Boss Ayleid Reliquary at location B on map
- 5 Vampire Ayleid Chest 01
- 2 Vampire Ayleid Chest 02
- 1 Vampire Ayleid Chest 04 (Healing)
- The following weapons will always be found: 1 Fine Iron Shortsword, 1 Iron Arrow, 1 Iron Bow, 1 Steel Longsword and 1 Steel Shortsword
Doors and Gates:
- There are three doors in/out of this zone:
- 1 door (at J) leads to the zone Excavated Ruin
- 2 doors (at K and L) lead to the zone Cava Arpenia
- 2 doors (at M and N) lead to the zone Cava Beldameld
- 2 doors (at O and P) lead to the zone Cava Marspanga
- 1 door (at Q) leads to the zone The Nefarivigum
Other:
- 3 bedrolls at locations b on map
Zone 8: Cava Arpenia[edit]
This zone is a small side chamber of Varsa Baalim and can be accessed through either of the doors at K and L. It consists of a single, bloodied room hosting two vampires, a minor loot chest, a sack of gold and two bedrolls (b). In the northeastern corner is a large pile of bones alongside a skeleton and a dead Drothmeri Veteran.
Occupants:
- 2 Vampires
- 1 Drothmeri Veteran (dead)
Treasure:
- 1 Vampire Ayleid Chest 01
- 1 Sack of Gold
- The following items will always be found: 1 Iron Dagger
Doors and Gates:
- There are two doors in/out of this zone
- 2 doors (at K and L) lead to the zone Varsa Baalim
Other:
- 2 bedrolls
Zone 9: Cava Beldameld[edit]
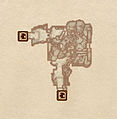
This zone serves as a connection between the lower (door M) and upper (door N) levels of the southwestern section of Varsa Baalim. It consists of a single room which has collapsed into ruins and is tilted sideways at an angle. The rooms hosts a Vampire alongside plenty of bones and rubble.
Occupants:
- 1 Vampire
Doors and Gates:
- There are two doors in/out of this zone
- 2 doors (at M and N) lead to the zone Varsa Baalim
Zone 10: Cava Marspanga[edit]
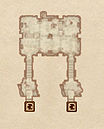
This zone serves as a connection between the lower (door O) and upper (door P) levels of the southwestern section of Varsa Baalim. It consists of two corridors connected to a central room. After passing the bloodied corpse of a dead Drothmeri veteran, you will arrive in the main room, where you will find three Drothmeri soldiers engaged in a desperate fight with three vampires. Wait for one side to come out on top and then mop up the survivors. In the room you will also find two minor loot chests, two bedrolls and the usual piles of bones and skeletons.
Occupants:
- 3 Drothmeri Soldiers
- 3 Vampires
- 1 Drothmeri Veteran (dead)
Treasure:
Doors and Gates:
- There are two doors in/out of this zone
- 2 doors (at O and P) lead to the zone Varsa Baalim
Other:
- 2 bedrolls
Zone 11: The Nefarivigum[edit]
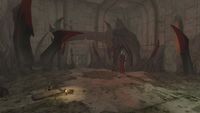
The Nefarivigum is the inner sanctum of the ruin and is suffused throughout with a menacing red light. Upon entering from door Q you will stumble across a staircase with three corpses (two Drothmeri veterans and one vampire) and sack containing healing potions. A second staircase also has three corpses (one veteran and two vampires) as well as a boss chest (B). Finally you will emerge in a room filled with Daedric architecture. Here you will find Frathen Drothan (F) conversing with a strange silvery creature set in a vertical, open coffin. Also nearby are a bedroll (b), Drothan's field journal and a sack containing healing potions.
After defeating Drothan, you will need to open the gate at (C) to take Mehrunes' Razor (R). If your strength is above 90 you will be able to do so on your own; if not you will need to take the beating heart from the silvery creature, who is actually Dagon's champion Msirae Faythung (M). Whatever the case, Msirae awakens and will attack you. Once you have defeated him, the gate at C will lower, allowing you to grab the Razor. At this point a secret wall (D) will open to reveal door S to the Forgotten Tunnels.
Occupants:
- Frathen Drothan at location F on map
- Msirae Faythung at location M on map
- 3 Drothmeri Veterans (dead)
- 3 Vampires (dead)
Treasure:
- 1 Bandit Boss Chest 02 at location B on map
- 2 Sacks (Healing)
- The following quest items will always be found: 1 Mehrunes' Razor at location R on map
- The following items will always be found: 1 Drothan's Field Journal and 1 Cheap Wine
Doors and Gates:
- There are two doors in/out of this zone
- 1 door (at Q) leads to the zone Varsa Baalim
- 1 door (at S) leads to the zone Forgotten Tunnels
- 1 Gate at C
- 1 Secret Wall at D
Other:
- 1 bedroll
Zone 12: Forgotten Tunnels[edit]
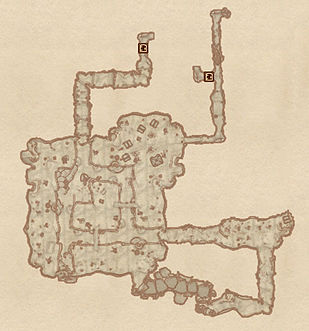
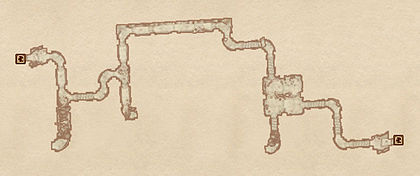
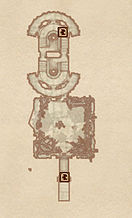
After entering from door S, avoid the tunnel to the west as it only contains a cave in trap (T) and head south instead. Defeat the nuisance animals in the next room (up to three rats or mudcrabs) and swim to the door at Out, which opens directly into Lake Canulus. Note that if you enter from the lake before you've completed the related quest, you will not be able to progress past door C, which will have a key-requiring lock.
Occupants:
- 1-3 Nuisance Animals
Traps:
- 1 Cave In trap at location T on map
Doors and Gates:
- There are two doors in/out of this zone
- 1 door (at S) leads to the zone The Nefarivigum
- 1 door (at Out) leads outside
- 1 door at C (requires a key; locked until you complete Unearthing Mehrunes Razor)
